

Beekeeping 101: How to Start Beekeeping, A Step-by-step Guide
Nov 18, 2023Becoming a beekeeper is a rewarding experience, but it does require preparation and quite a bit of learning. Here's a step-by-step guide to help you get started. If you genuinely want to keep bees one day, take your time, go through the steps and you will be keeping bees before you know it!
One important thing to mention
We all like to learn in different ways. This article breaks down how to become a beekeeper in a digital format. All of this content is also in a free PDF for you to download and print out if you prefer a hard copy. It's also explained in the video below. This first step - figuring out if beekeeping is right for you is an important one, so choose how you like to learn best.
How to Start Beekeeping, the video:
Or
Download Your FREE Book
The 7 Steps to Getting Started Keeping Bees

Step 1 - Learn About Honeybees & the Hive
Before you buy anything, take a class, or join your local bee associaiton, FIRST, learn about honeybees and how the hive works. There are A LOT of places you can learn about bees. I love a good book. Some of my favorites were, but there are also some great documentaries, YouTube videos and blogs.
Here are some of my favorite places to learn about bees:
Favorite Honey Bee Books:
- Letters From the Hive (my absolute favorite)
- The Beekepeer's Bible
- Langstroth's Hive and the Honey-Bee
- The Beekeeper's Lament
- Honey Bee Democracy (not a beginner book, but really loved this one as well)
Favorite Documentaries About Honey Bees:
- More Than Honey
- Queen of the Sun
- Vanishing of the Bees
Favorite Blogs About Bees:
Favorite YouTube Videos About Bees:
- Time Lapse of a bee hatching
- How Do Bees Get Thier Jobs
- Maddie Moate's Beekeeping Playlist
- 12 Fun Facts About Bees
- Your Dictionary of Beekeeping Terminology
Favorite Places to Learn About Bees with Kids:
- Bubble Guppies kids cartoon has an episode about honey bees
- Magic Schoolbus episode in the hive
Learn About Bee Biology for FREE!
Sign up for a free trial of our online beekeeping course, Beekeeping for Beginners, and you'll receive immediate access to chapters 1 & 2 which are about bee biology and how to become a beekeeper. Click here to sign up today and start learning!

Here's a Short Introduction to Honeybees and the Hive
Honeybees are very social creatures. They live in what we call a colony. A colony is, essentially, a family of bees. Within the colony, there is a queen bee. Every colony has just one queen and she is the mother of the bees in the hive. Her primary role is to lay eggs. She is the only female in the hive that mates and lays fertilized eggs. You can learn more about the queen in our article, "The Queen Bee & Her Role In the Hive".
The majority of the bees in the colony are worker bees. Worker bees are all female, but they never mate and rarely lay eggs. They do the majority of the work in the hive. They feed the eggs and larvae and keep them warm, they cool down the hive when it's hot, they produce heat when it's cold, they gather food, they clean the hive and they defend the hive. Almost every job in the hive is done by a worker bee except one – the reproductive part. Learn all about the worker bee in this article, "Everything You Wanted to Know About the Worker Bee".
 This brings me to the third member of the colony, the males. Male honey bees are often referred to as drones and they are brothers of the worker bees and sons of the queen bee. Their job is to leave the hive and wait in drone congregatong areas for a queen bee to fly by. If he spots a queen, he will try to catch up with her and mate with her while flying in the air. After mating, he dies. If he does not mate, the worker bees will kick him out of the hive (and he will die shortly thereafter) once there is a lack of flowers blooming (what we call a nectar flow ending). This is because drones are not necessary for a hive's survivial. The queen in the hive does not mate with the drones in her hive (her sons). Once there is a shortage of food coming into the hive, the drones are kicked out so that the hive does not lose the precious honey they worked so hard to gather.
Step 2 - Make Sure You're Not Allergic to Honeybees
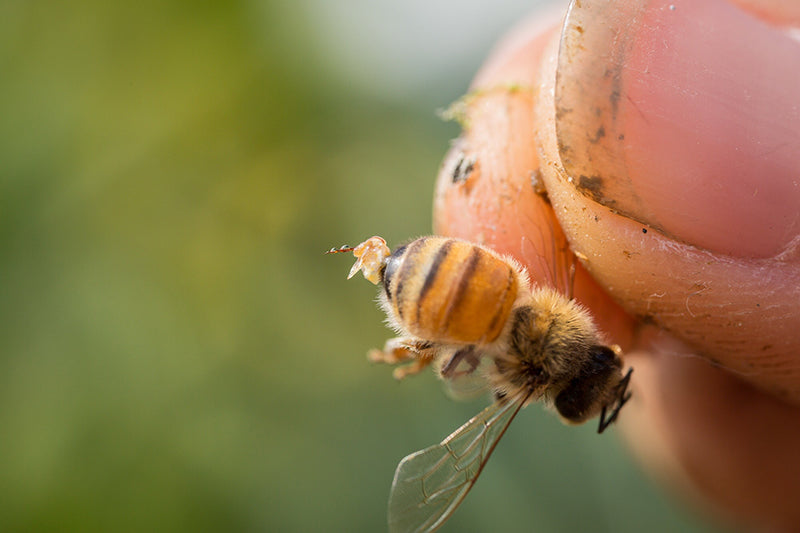
You may have been stung by a wasp and not swelled up, but are you allergic to honeybees? Before you start your journey to becoming a beekeeper, make sure you don't react badly to a honeybee sting. Most people have a minor reaction to getting stung – they swell up and the area is itchy for a few days – this type of reaction is okay.
Signs of a severe allergy are heart palpitations, itchy bottoms of the feet and palms of the hand, throat closing up, and difficulty swallowing and/or breathing. Talk to your doctor if you're not sure and see if they can conduct an allergy test. It doesn't matter how much protective clothing you wear, you will get stung eventually. Bees can crawl up under your gloves or in little crevices where your pants meet your shoes. Maybe a bee hitched a ride on your back and you accidentally squish her while taking your suit off. The possibilities are endless...
Some say this step should be done first, and they may be right, but I love to read and learn about new things so I prefer to start with something fun and then more on to the not-so-much fun task of seeing if you're allergic.
Check out my article, What To Do If You're Stung and How to Avoid It, for my best tips on how to get that stinger out fast so you don't swell up and ways to keep your bees calm so they don't want to sting you. However, you WILL get stung if you keep bees. There is no amount of protective gear you could wear that will prevent it from ever happening. It often happens when you are distracted and don't even know she's there!
Step 3 - Try It Out! (Optional)
 This step is not necessary in order to become a beekeeper, but can save you a lot of stress, time and money in the long run. I strongly encourage you to find a local beekeeper to shadow or take an in-person beekeeping class. Get your hands sticky and see if you like it. A lot of people don't realize how hard beekeeping is (a medium honey super can weigh over 35 pounds) until they give it a shot.
If you're having trouble finding someone to shadow, contact your local bee association and ask if they can send an email out to their members asking if anyone is willing to let you hang out with them and their bees. If there is a way you can give back, offer that as well. If you're strong, offer to help move bees. Offer to help harvest honey or label jars. If you're a designer, offer to make them a honey label for free. Get creative and think of ways to offer help in tasks that aren't fun to do. Most beekeeping organizations and a few universities and apiaries offer in-person beekeeping classes.
If you have the time, you can also do what I did. I worked for an apiary for free. I found a 6 month internship through the WWOOFing website (world wide opportunities on organic farms) and worked there in exchange for room and board. I, then, emailed every apiary I could find in a 30 mile radius offering to work for free. this led to a paying job with another bee farm down the road. They weren't hiring beekeepers, but they needed help in their store. It wasn't beekeeping to start, but I learned A LOT about honey production and eventually worked my way to keeping bees for them. Many farms are happy to take on volunteers for the grunt work, especially in the summer months when they're busy harvesting honey. You never know what it could lead to.
Here is a link to a list of bee associations according to state.
Tip! Come prepared.
Learn about bees before you shadow a beekeeper. Knowing the basics about bees and beekeeping will help you ask better questions and you will learn more from the experience.
Step 4 - Find a Location
Do you have a place for your bees?
When looking for a spot for your bees, you want:
- Lots of flowers, especially flowering trees
- Quiet and away from people and pets
- Safe from wind and animals such as bears
- Level (or the ability to level with a palette and wood under the legs)
- Legally permitted area
- Far from areas that may be sprayed with pesticides. Learn more about the effect of Roundup on bees and humans at consumernotice.org.
A reasonable distance
Although you want your bees away from people and pets, you also need to consider the fact that you will be carrying heavy honey boxes to your house when harvesting honey. These boxes, when full, can weigh 35 pounds or more. You will also need to scrape away dead bees blocking the front entrance every few weeks in the winter time, shovel snow blocking the entrance and check on food stores. Find that sweet spot that is just far enough away but not too far away.
What you don't want in a location for your bees:
- bright lights (such as your home at night)
- close to where pets and/or children spend time
- near sidewalks and high traffic areas
- near a pool (Bees love chlorinated water. I don't know why but some people put a little bit of bleach into their water source to draw bees to it!)
- steep
- far walk without ability to get there by vehicle
If you choose to keep bees at your home, make sure everyone that lives on the property, or who will be affected by the bees, is on board and not allergic. It is up to you whether you want to talk to your neighbors, but I will warn you - almost every beekeeper I know has a "neighbor story" about a neighbor who was not so happy with their bees. If a pool is nearby, beware, pools often attract bees even if you provide them with a water source.
If you can't keep bees at your home, there are a lot of other places to put them. Cemeteries, retreat centers, office parks, schools, rooftops and botanical gardens are all great places to contact. Check out our article, 10 Places to Keep Bees Other Than Your Yard for ideas & tips. I, personally, have kept bees on my property, at a community garden, on farms, on private property owned by other people and at a botanical garden. Keeping bees at your home is, by far, the best because you can spend time watching your bees at the entrance which will give you a feel for how they are doing without having to open the hive so often, but you will find that beekeeping is much more enjoyable when your bees are healthy and busy and this is primarily determined by their location.
Step 5 - Beekeeping Equipment
A beehive is where the beekeeper puts a colony of bees. It becomes the bees' home and where they store their honey and the developing bees (brood) are kept.
There are a lot of different styles of beekeeping equipment. Make it easy for yourself and start with the hive style that is the most common where you live. Here in the U.S., most beekeepers have Langstroth hives. It makes buying equipment and finding help much easier.
TIP!
Start with the hive style that is the most common where you live. It will making finding a mentor, getting help, and ordering equipment a lot easier.
Step 6 - The Role of the Beekeeper
So far so good, right? Now you have to learn what the beekeeper does. This is a BIG topic. At the basic level, the beekeeper has 5 main jobs.
The jobs of the beekeeper:
- Manage space
- Protect the hive from robbing
- Manage pests
- Mange food storage
- Manage the queen and brood (developing bees)
Let's go through what these mean.
Manage Space
 Most beehive styles have an inside space that can be made bigger or smaller depending on the size of the colony. When the colony is small, the hive should also be small. As the colony grows, the beekepeer makes the hive larger. This is done by adding boxes to a Langstroth beehive or if you're using a top bar hive, you would move the follower board. As it cools down, the colony will become smaller and boxes will be taken away.
You also manage the space when helping the hive prepare for winter. This is done by consolidating the bees to just a couple of boxes, adding insluation, an upper entrance, food on top and something to absorb moisture.
Protect
There are a lot of animals that want to steal the bees' honey or take advantage of a nice, warm beehive to make their home. Bears, skunks, mice, wasps and other honeybee colonies have all been known to attack and sometimes even kill a beehive.
A mouse guard is put over the entrance of the hive when it gets cooler at night to keep mice away. Elevating your hive at least 18" keeps skunks at bay and an electric fence around your hives usually is enough to deter bears (Make sure you put the fence up BEFORE a bear attacks the hive. Once they get a taste of the sweet honey in a hive, an electric fnece might not be enough ot keep them away).
Tip!
Make sure you put the fence up BEFORE a bear attacks the hive. Once they get a taste of the sweet honey in a hive, an electric fence might not be enough ot keep them away.
Other bees and wasps can also attack a colony to the point that it collapses. It is important for the beekeeper to spot an attack and help the colony out befor eit's too late. We call this robbing and it usually happens when there aren't many flowers blooming (a dearth is when it is warm out but there aren't many flowers blooming and the bees are struggling to find food), either late summer and early fall or when it is a time of drought and the flowers have died off. You will want to reduce the hive's entrance so they have a smaller space to guard as well as make sure there is no honey or syrup outside the hives to attract attention from other pollinators.
Dearth
A dearth is when there aren't many flowers blooming, therefore the bees struggle to find food to gather. Common times of dearth are mid summer when it's really hot and dry or late summer/early fall when most of the summer-bloming flowers have deid off.
Manage Pests
 The three main pests that will attack a beehive are the varroa mite, small hive beetle and wax moth. The varroa mite is the primary pest the beekeper needs to manage. It is very important that the beekeeper have a proactive approach and keep a hive healthy as opposed to react when the hive is weak with mites. Once a hive is noticeably weak, it is often too late for them to recover.
Pest management is a very big topic to learn about and crucial to your hive's survival.
You can learn about this topic from beekeeping classes or through online reaearch. No matter what way you choose to learn, make sure you understand what needs to be done and have a plan before your bees arrive.
Manage Food Storage
You may need to feed your bees in the early spring when there aren't a lot of flowers blooming as well as in the fall and winter.
Manage the Queen Bee
It's important that your hive have a queen that is healthy and laying eggs! Without a healthy, laying queen, your hive will die. The beekeeper keeps an eye on the brood (baby bees) to make sure they see brood in all three stage of development - eggs, larva and pupa.
You will want to open your hive once every 1-2 weeks and inspect your bees. You can download my inspection sheet to guide you through your inspections and watch the video below to understand what you're looking at when inspecting a hive.
Anotehr valuable resource is the video, What You DON'T Want to See In Your Beehive, so you know what a problem looks like, how to prevent it and what to do if you spot this in your hive.
Step 7 - Order Your Bees
Contact a local apiary to order your bees. Bees are sold as either a nuc or a package. A package of bees is a screened-in cage with thousands of worker bees, one caged queen and a can of syrup. This is the cheapest option, but more difficult to install and will take the bees longer to get established.
Your other option is to buy a nuc (short for nucleus hive). A nuc is a mini beehive. It comes with 4-5 frames of honeycomb full of baby bees and food along with worker bees and a queen that is laying eggs. It is much easier to install and your colony will grow a lot faster. However, a nuc is more expensive.
Do NOT have bees shipped to you! It is very common for them to arrive dead.
If given the option, ask for a marked queen. This means that the queen will have a dot of paint on her back and makes it easier to spot her.
I recommend ordering 2-3 colonies your first year. It is very difficult to care for just one colony. If this colony isn't healthy, then your year with the bees will be difficult and stressful, but hold off on getting more than 3 colonies until you've kept your bees alive for a full year.
Step 8 - Order Your Equipment
I like to purchase my beekeeping equipment from dadant.com. Everything I have bought there was high quality and lasted a long time. I also highly recommend the wax-coated beehives from Galena Farms. Use coupon code LARYSSA for 5% off your purchase.
If you choose to use a langstroth style beehive, you have a few options in box sizes. 8 frame boxes hold 8 frames and 10 frames boxes hold 10. The benefit of an 8 frame box is that it weighs less. However, it also has less room for the bees to build honeycomb, causing the beekeeper to need more boxes.
The size box you go with will detemrine how many frames you need to purchase.
There are also three different heights to the boxes. A deep box is the deepest and used for the first two boxes of the hive where the baby bees are. The boxes above the deeps can either be mediums or shallows. The difference is juist 1" in height. A medium box will weigh about 10lb more when full of honey than a shallow box.
Whatever size box you choose to purchase, pick no more than 2 sizes and do the same thing for every hive!
You will need:
- 1 smoker
- 1-3 hive tools
- 1 pair of sting-resistant gloves
- 1 veil/veiled jacket/beekeeper suit
For each colony of bees you have, you will need:
- 16-20 deep frames
- 16-20 shallow or medium frames
- 2 deep boxes (8 or 10 frame)
- 1 bottom board
- 1 mouse guard
- 1 entrance reducer
- 1 inner cover
- 1 telescoping outer cover
- 1 feeder
For a beehive diagram and checklist, download my free guide, The 7 Steps to Getting Started Keeping Bees.
Step 9 - Get Your Equipment Ready
Most equipment requires painting and assembling. You'll want to let the boxes air out after painting for a few weeks before you put your bees inside. The video above shows you how to assemble a langstroth style deep box and frame with foundation as well as how the hive works and the parts.
What's Next?
So you read the steps, but now what? Here's what I recommend:
- Download our guide, The 7 Steps to Getting started Keeping Bees, and print it out! Don't let it be one more thing on your computer that you forget about.
- Attach the pages to a wall or your frig. Take your time and go through each page one-by-one.
- By the last step, you'll have your bees on the way and be a beekeeper that Spring!
Final Tip
If you start feel overwhelmed or as if it's too muhc work, here's a favorite quote of mine, "Don't let the fear of the time it will take to accomplish something stand in the way of your doing it. The time will pass anyway." ~ Earl Nightingale
Do things to inspire you to keep going! Follow some beekeeping Instagram pages, watch bee documentaries on Netflix. My favorite is More Than Honey. Tell your friends and family you're going to be keeping bees or get into beekeeping with someone.
Want to learn more about beekeeping?
Join our newsletter for blog updates, beekeeping videos, sales and contests.


